What to include
Your app details page needs:- A clear description of what your app does
- Setup instructions
- Links to documentation
- Link to where any settings for your app are hosted
- Support information
- Images to help your app stand out
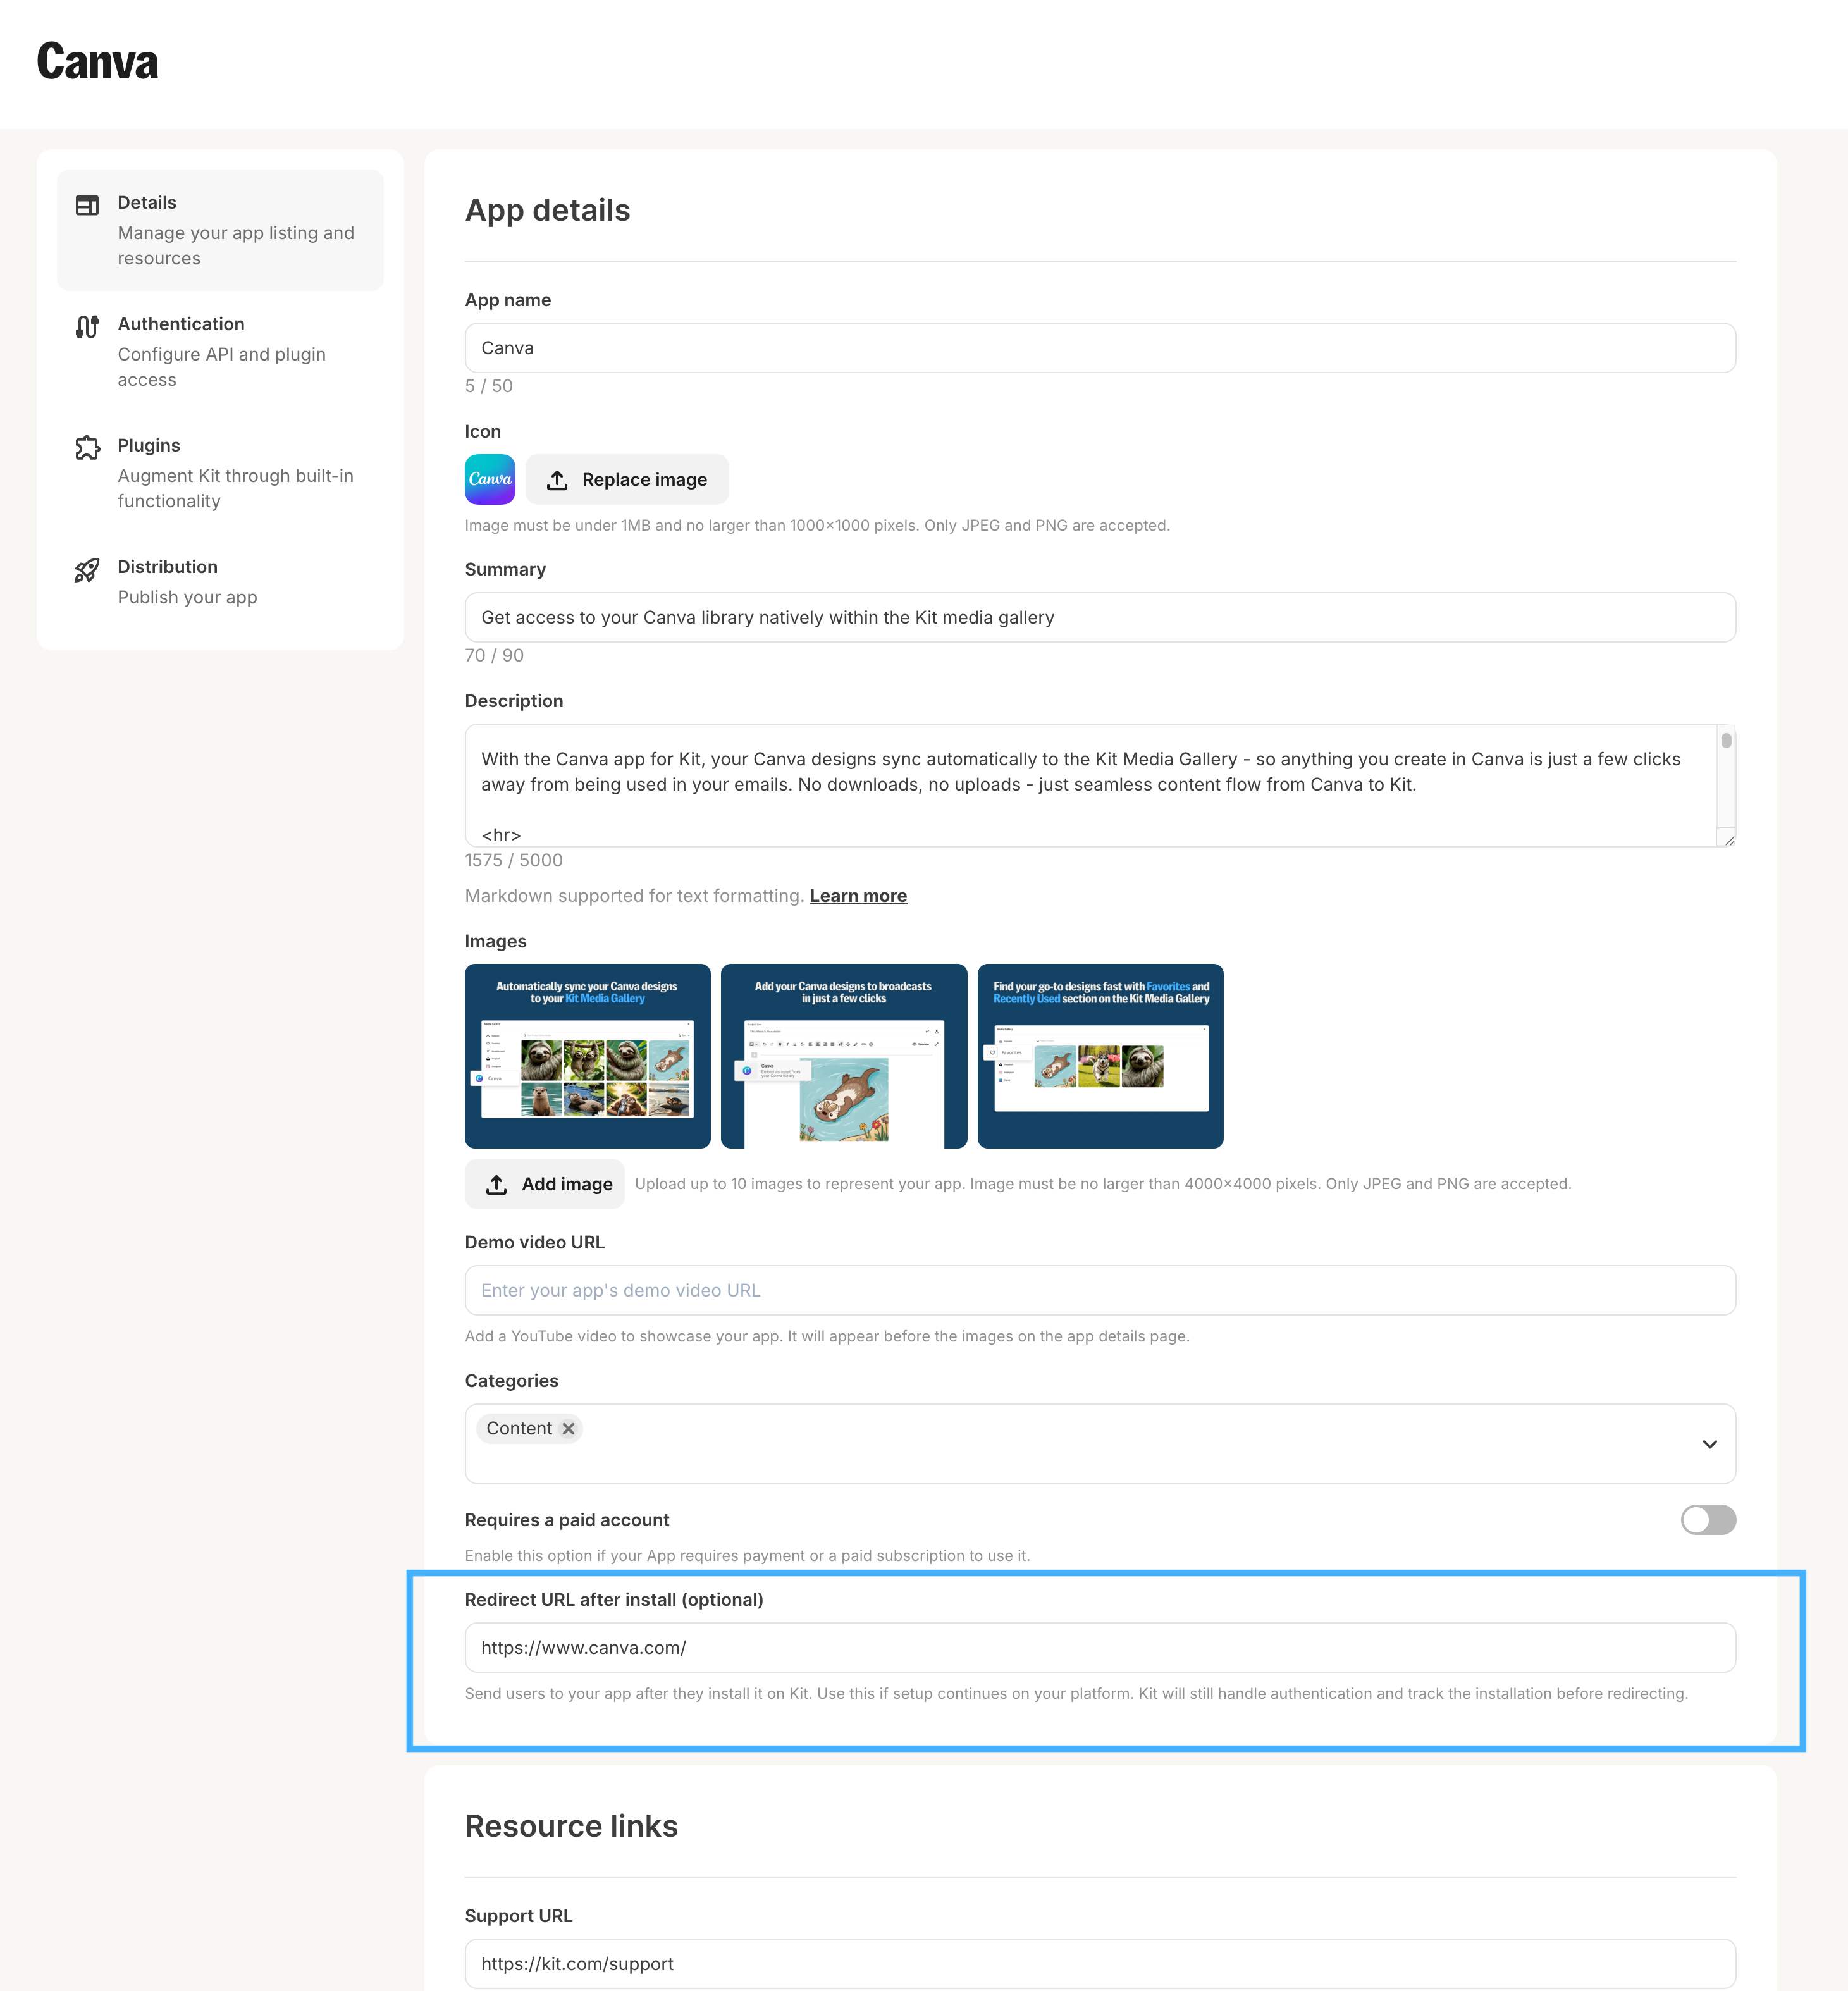
Redirect URL after install field. An example of this flow can be seen below.
Example redirect flow
Example redirect flow
Redirect flow settings
Redirect flow settings
How to configure
Go to the top navigation menu “Automate” > “Apps” > “Build”. From there, click your app’s “Edit” button to display a form with fields for the app details page. Then, update these key fields:Markdown support
We currently offer the following markdown support for the app description:- Headings
# Heading 1and## Heading 2- Deeper heading levels (
###to######) are accepted, but render identically to## Heading 2
- Formatting
**bold***italic*
- Lists
- Unordered lists (
- item) and ordered lists (1. Item), including nesting
- Unordered lists (
- Links
[link text](https://example.com)—httpandhttpsURLs only
- Blockquotes
> quoted text
- Code
- Inline code:
`code` - Code blocks: indent lines with 4 spaces, or fence them with
~~~(backtick```fences are not supported and will render as broken inline text)
- Inline code:
Using HTML
You can also write these same elements as plain HTML —<h1>, <h2>, <strong>, <em>, <ol>, <ul>, <li>, <a href>, <blockquote>, <pre>, <code> — and mix HTML with markdown. This is useful for finer control, such as nesting a bulleted list inside a numbered list.
One caveat: markdown syntax is not processed inside HTML blocks, so use HTML tags for formatting there (e.g. <strong>bold</strong> rather than **bold** inside an <li>).
Not supported
The following are not supported when your description is rendered:- Underline (
<u>) — removed together with the text inside it, so avoid it entirely - Images (markdown or
<img>) — stripped - Horizontal rules (
---or<hr>) — stripped - Manual line breaks (
<br>or trailing spaces) — stripped, and the adjacent words are joined with no space. Use blank lines between paragraphs, or a paragraph for extra spacing - Strikethrough (
~~text~~) — not parsed; the tildes show up as literal text mailto:andtel:links — these render looking like links but do nothing when clicked
Redirect handling
The OAuth redirect parameter automatically sends creators to your app details page after authentication. The URL format is: https://app.kit.com/apps/{app_id}If you have already published an app, no changes are needed if you’re using our dynamic redirect parameter. Your creators will seamlessly move from installation to your getting started guide. Otherwise, you will need to update your authentication flow to end on the redirect parameter appended to the initial call to your configured
authorization URLPreviewing your changes
While editing, click the Preview button (next to Save at the top of the App details form) to open a full-screen preview of your app details page. The preview:- Renders your unsaved changes — name, summary, icon, images, demo video, categories, resource links, and the markdown description — exactly as the Kit App Store will display them after saving.
- Uses the same server-side markdown rendering as the live page, so it’s a faithful check of which formatting survives (see Markdown support).
- Lets you save directly from the preview once you’re happy. For published apps, you’ll still get the usual confirmation that changes go live for all creators.


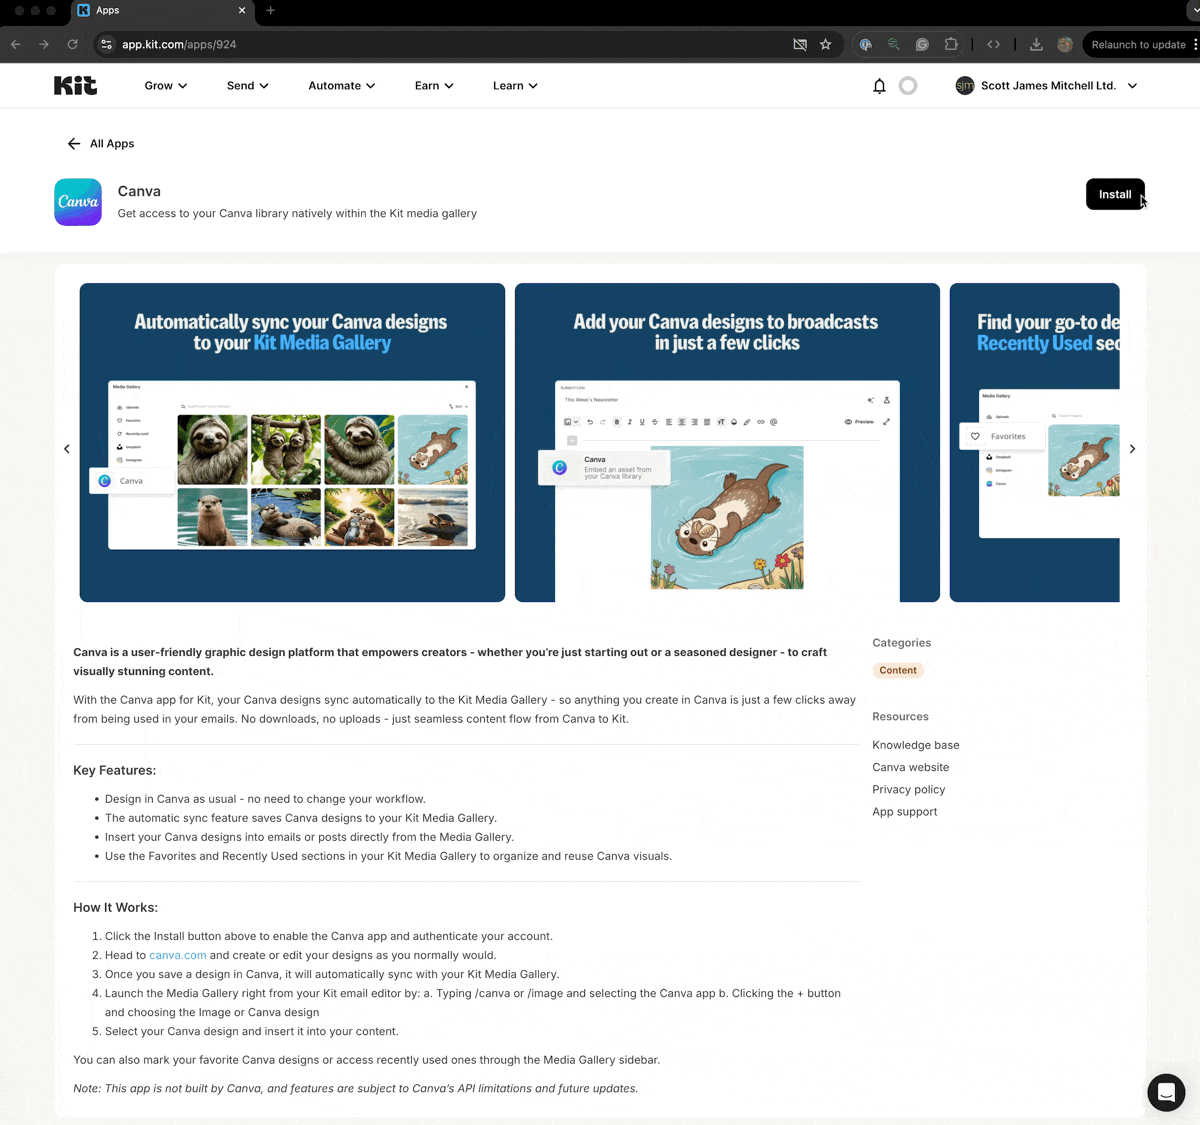
Sharing your app with creators
Once you’ve populated the app details page form, click “Save” to save your changes. You can also preview a saved app from the Build page via its “Preview” option: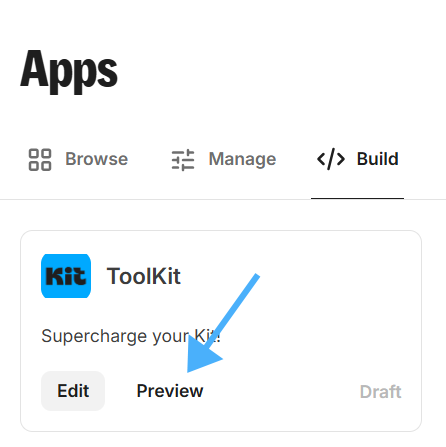
Best practices
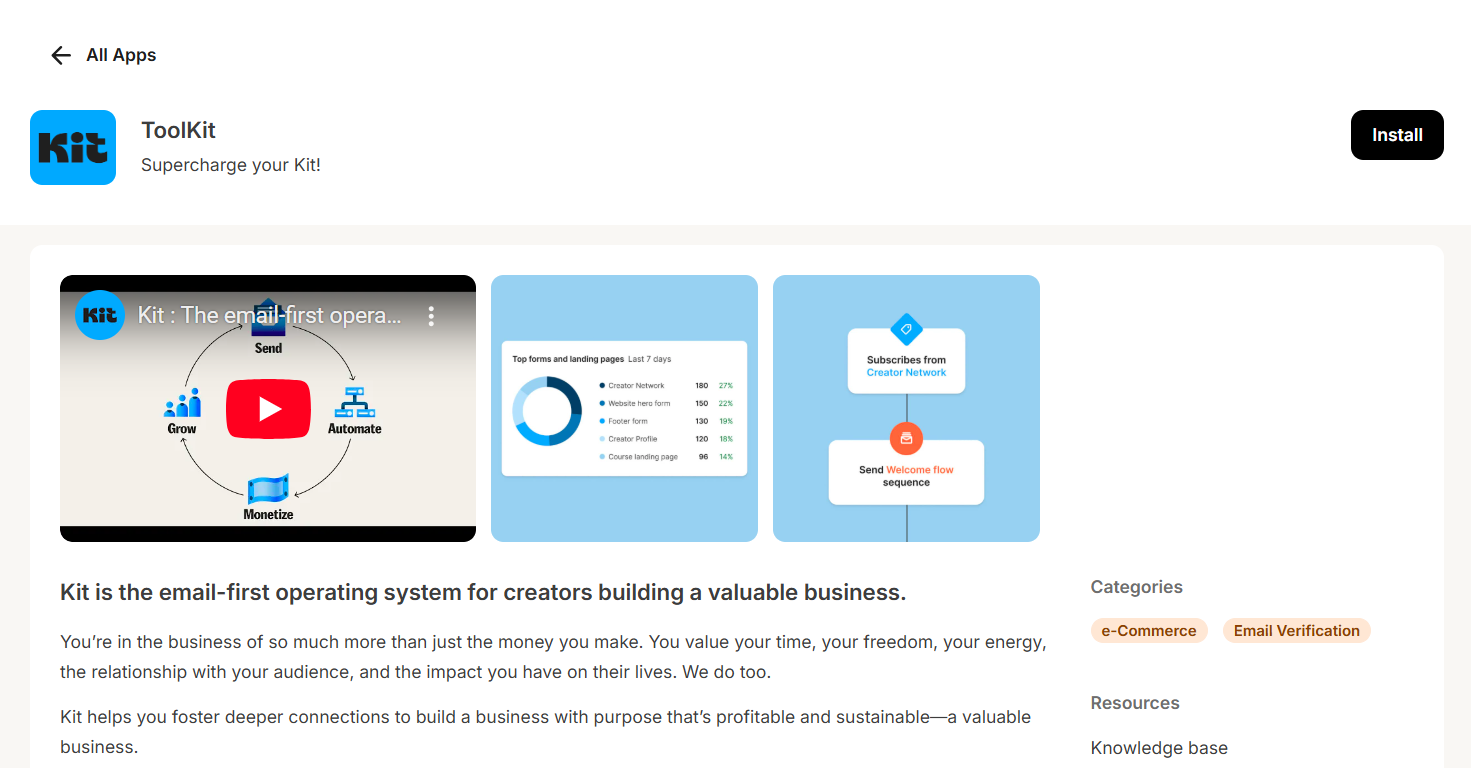
Your App Details Page is the primary way creators discover, learn about, and evaluate your app. For installation, it serves as both an educational and sales tool for convincing creators to try your app. Below are the components of a good App Details page:1
Clear and Compelling Description:
Highlight your app’s purpose and how it enhances the creator’s experience. Include benefits for both the Kit integration and standalone use
2
Standalone & App-Specific Functionality:
Describe how the app works within Kit and what it offers independently as a standalone experience
3
Feature Set:
Provide a concise breakdown of key features and their value
4
Visual Content:
Best Practice: At least 2-3 high-quality images showcasing app functionality along with an annotation on features or benefits of the App - examples:

5
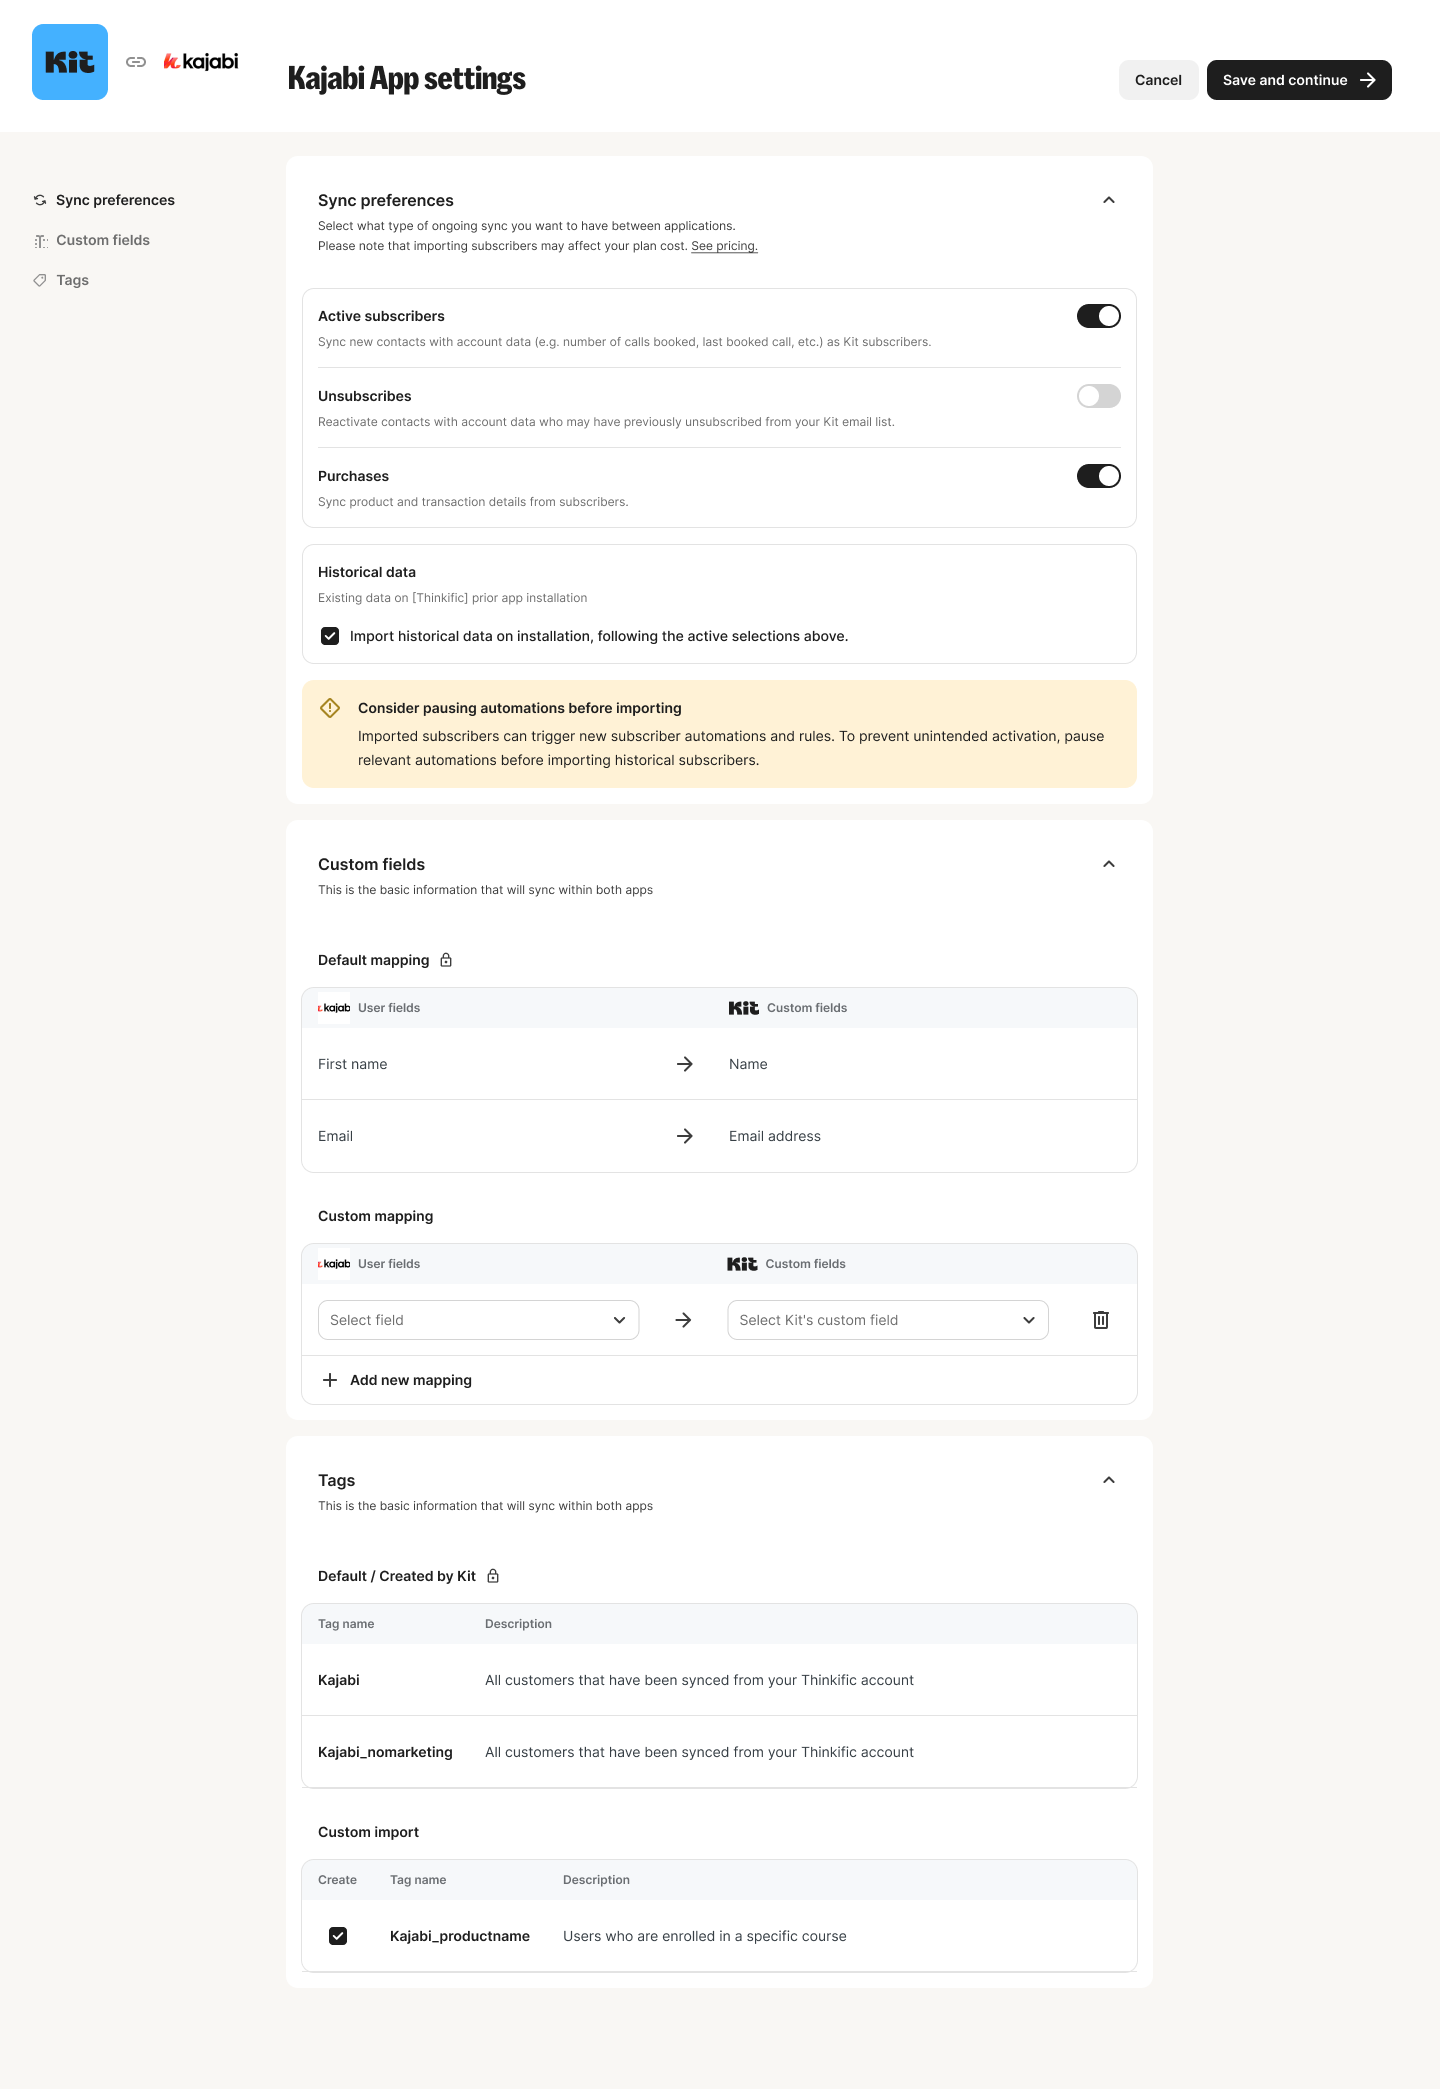
App Settings Configuration:
A configuration page lets creators customize how your app integrates with their Kit account—such as choosing which custom fields sync, toggling features on/off, or performing historical imports. This flexibility lets creators tailor the integration to their needs without unnecessary complexity. An example can be found below:
6
Support Resources:
- A general link to your app/platform support documentation
- A Help Center Article specific to your Kit integration with:
- Clear setup instructions
- FAQs addressing common creator questions
7
An app video (optional):
Although not required to publish, adding a video to your app details page allows you to market your app to Kit creators even further, showcasing the benefits of your app in a new engaging way