Plugin OAuth server setup
For OAuth, you’ll need to support 4 endpoints:- Getting an authorization code grant
- Requesting an access token using an authorization code
- Requesting an access token using a refresh token
- Revoking an access token
A diagram for this flow for apps that only require Plugin OAuth authentication can be found below. For guidance on apps that also require API authentication, also check out the app authentication guide here..
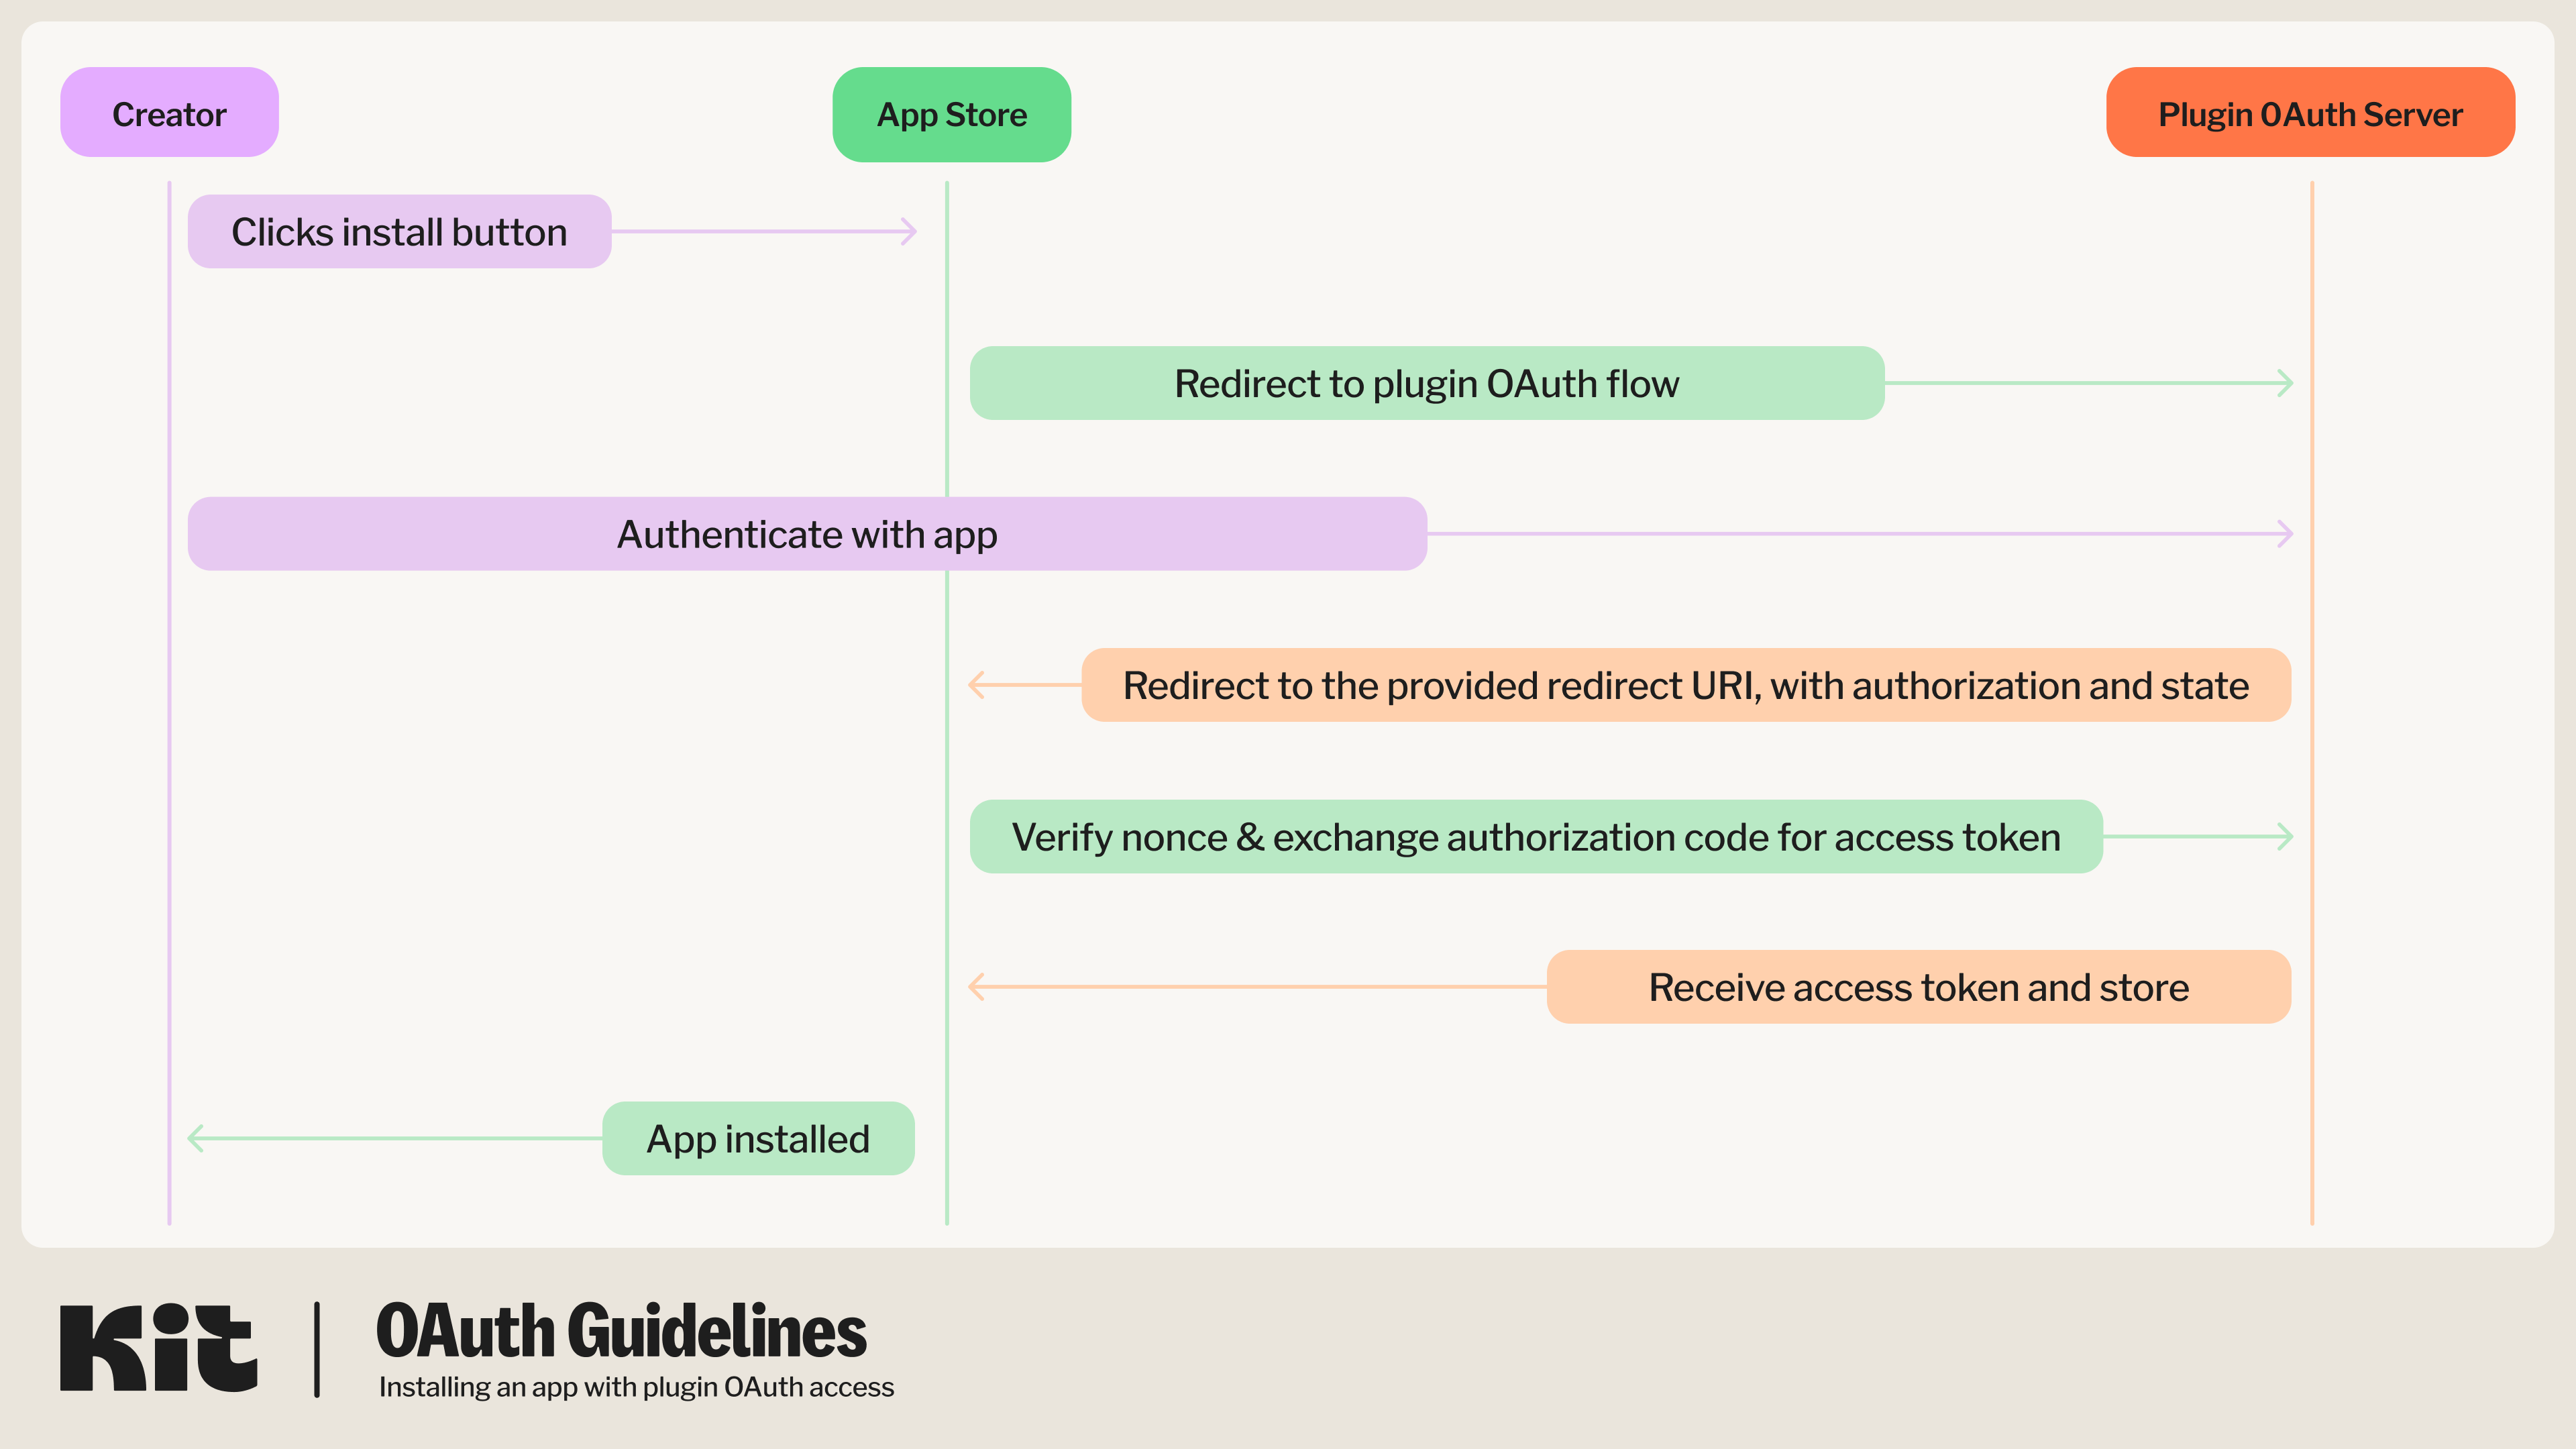
Get an authorization code grant
We will start the OAuth process by making a GET request to your provided authorization URL:Query Parameters
Query Parameters
Code samples
Code samples
Responses
Responses
302: Redirects to
https://app.kit.com/apps with authorization code parameterGet a new token using an authorization code
We will then exchange the returned authorization code for a new access token by making a POST to your configured token URL, with a body like so:Query Parameters
Query Parameters
Response schema: application/json
Your plugin’s configured Client ID
Your plugin’s configured Client Secret
authorization_codeThe code received via the redirect uri query params
https://app.kit.com/appsCode samples
Code samples
Responses
Responses
200: Returns a token
Response schema: application/json
Access token for a user in the plugin app’s system
When the access token expire in seconds
Refresh token that can be used to generate a new access token once this one expires
When the access token was created
Get a new token using a refresh token
When the previous access token expires, we will request a new access token by making a POST to your configured refresh token URL, with a body like so:Query Parameters
Query Parameters
Code samples
Code samples
Responses
Responses
200: Returns a token
Response schema: application/json
Access token for a user in the plugin app’s system
When the access token expire in seconds
Refresh token that can be used to generate a new access token once this one expires
When the access token was created
Revoke an access token
When your app is uninstalled by a creator, we will make a POST request to your revoke token URL, with a body like so:Query Parameters
Query Parameters
Code samples
Code samples
Responses
Responses
200: OK
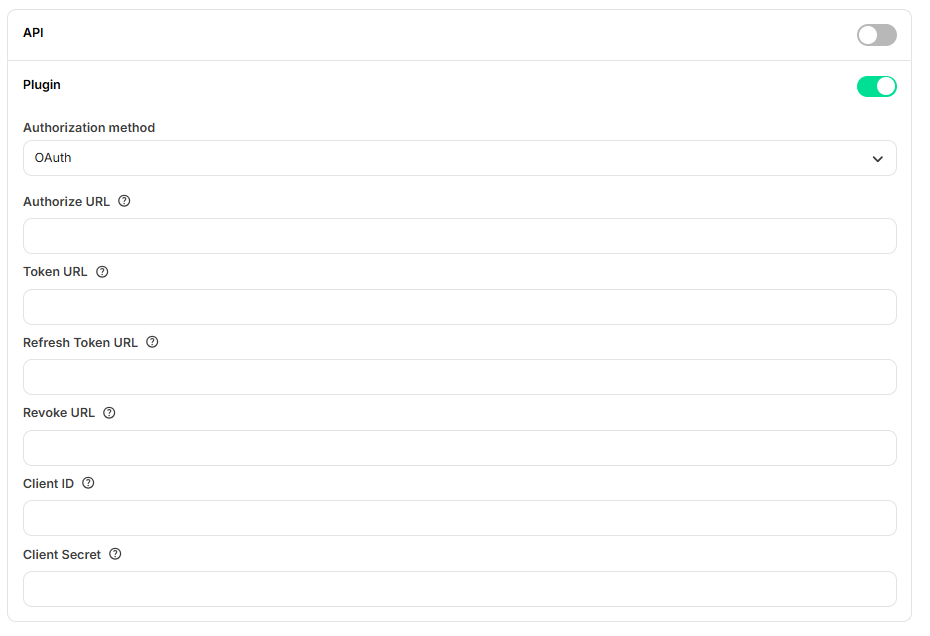
App configuration for OAuth
To set OAuth up for your app, go to the “Authentication” tab on your app, toggle on the “Plugin” section and select “OAuth” from the “Authorization method” dropdown: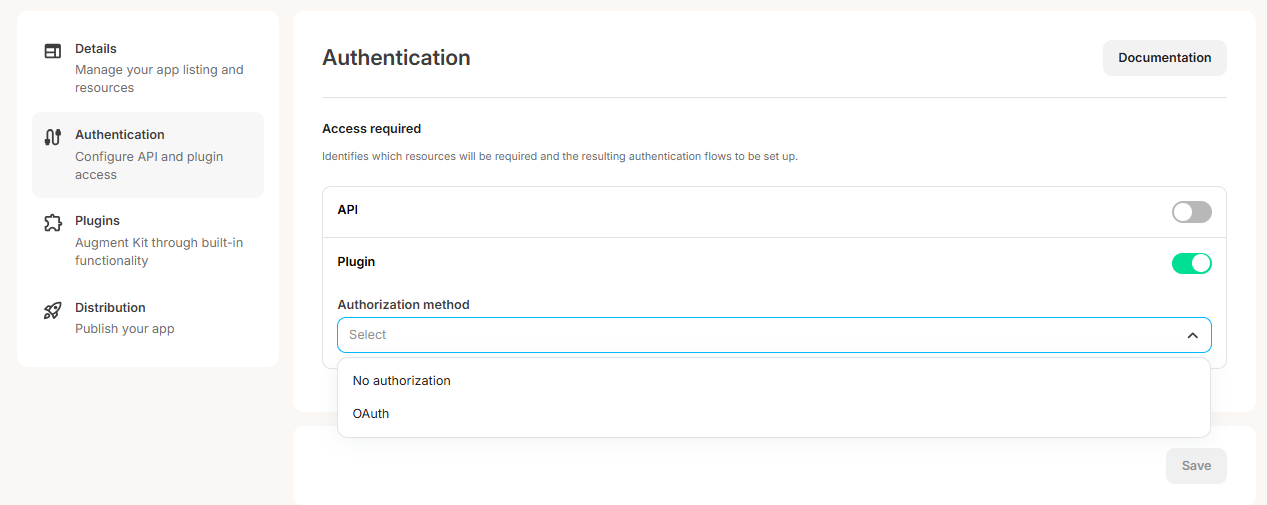
- Authorization URL
- Token URL
- Refresh token URL
- Revoke URL
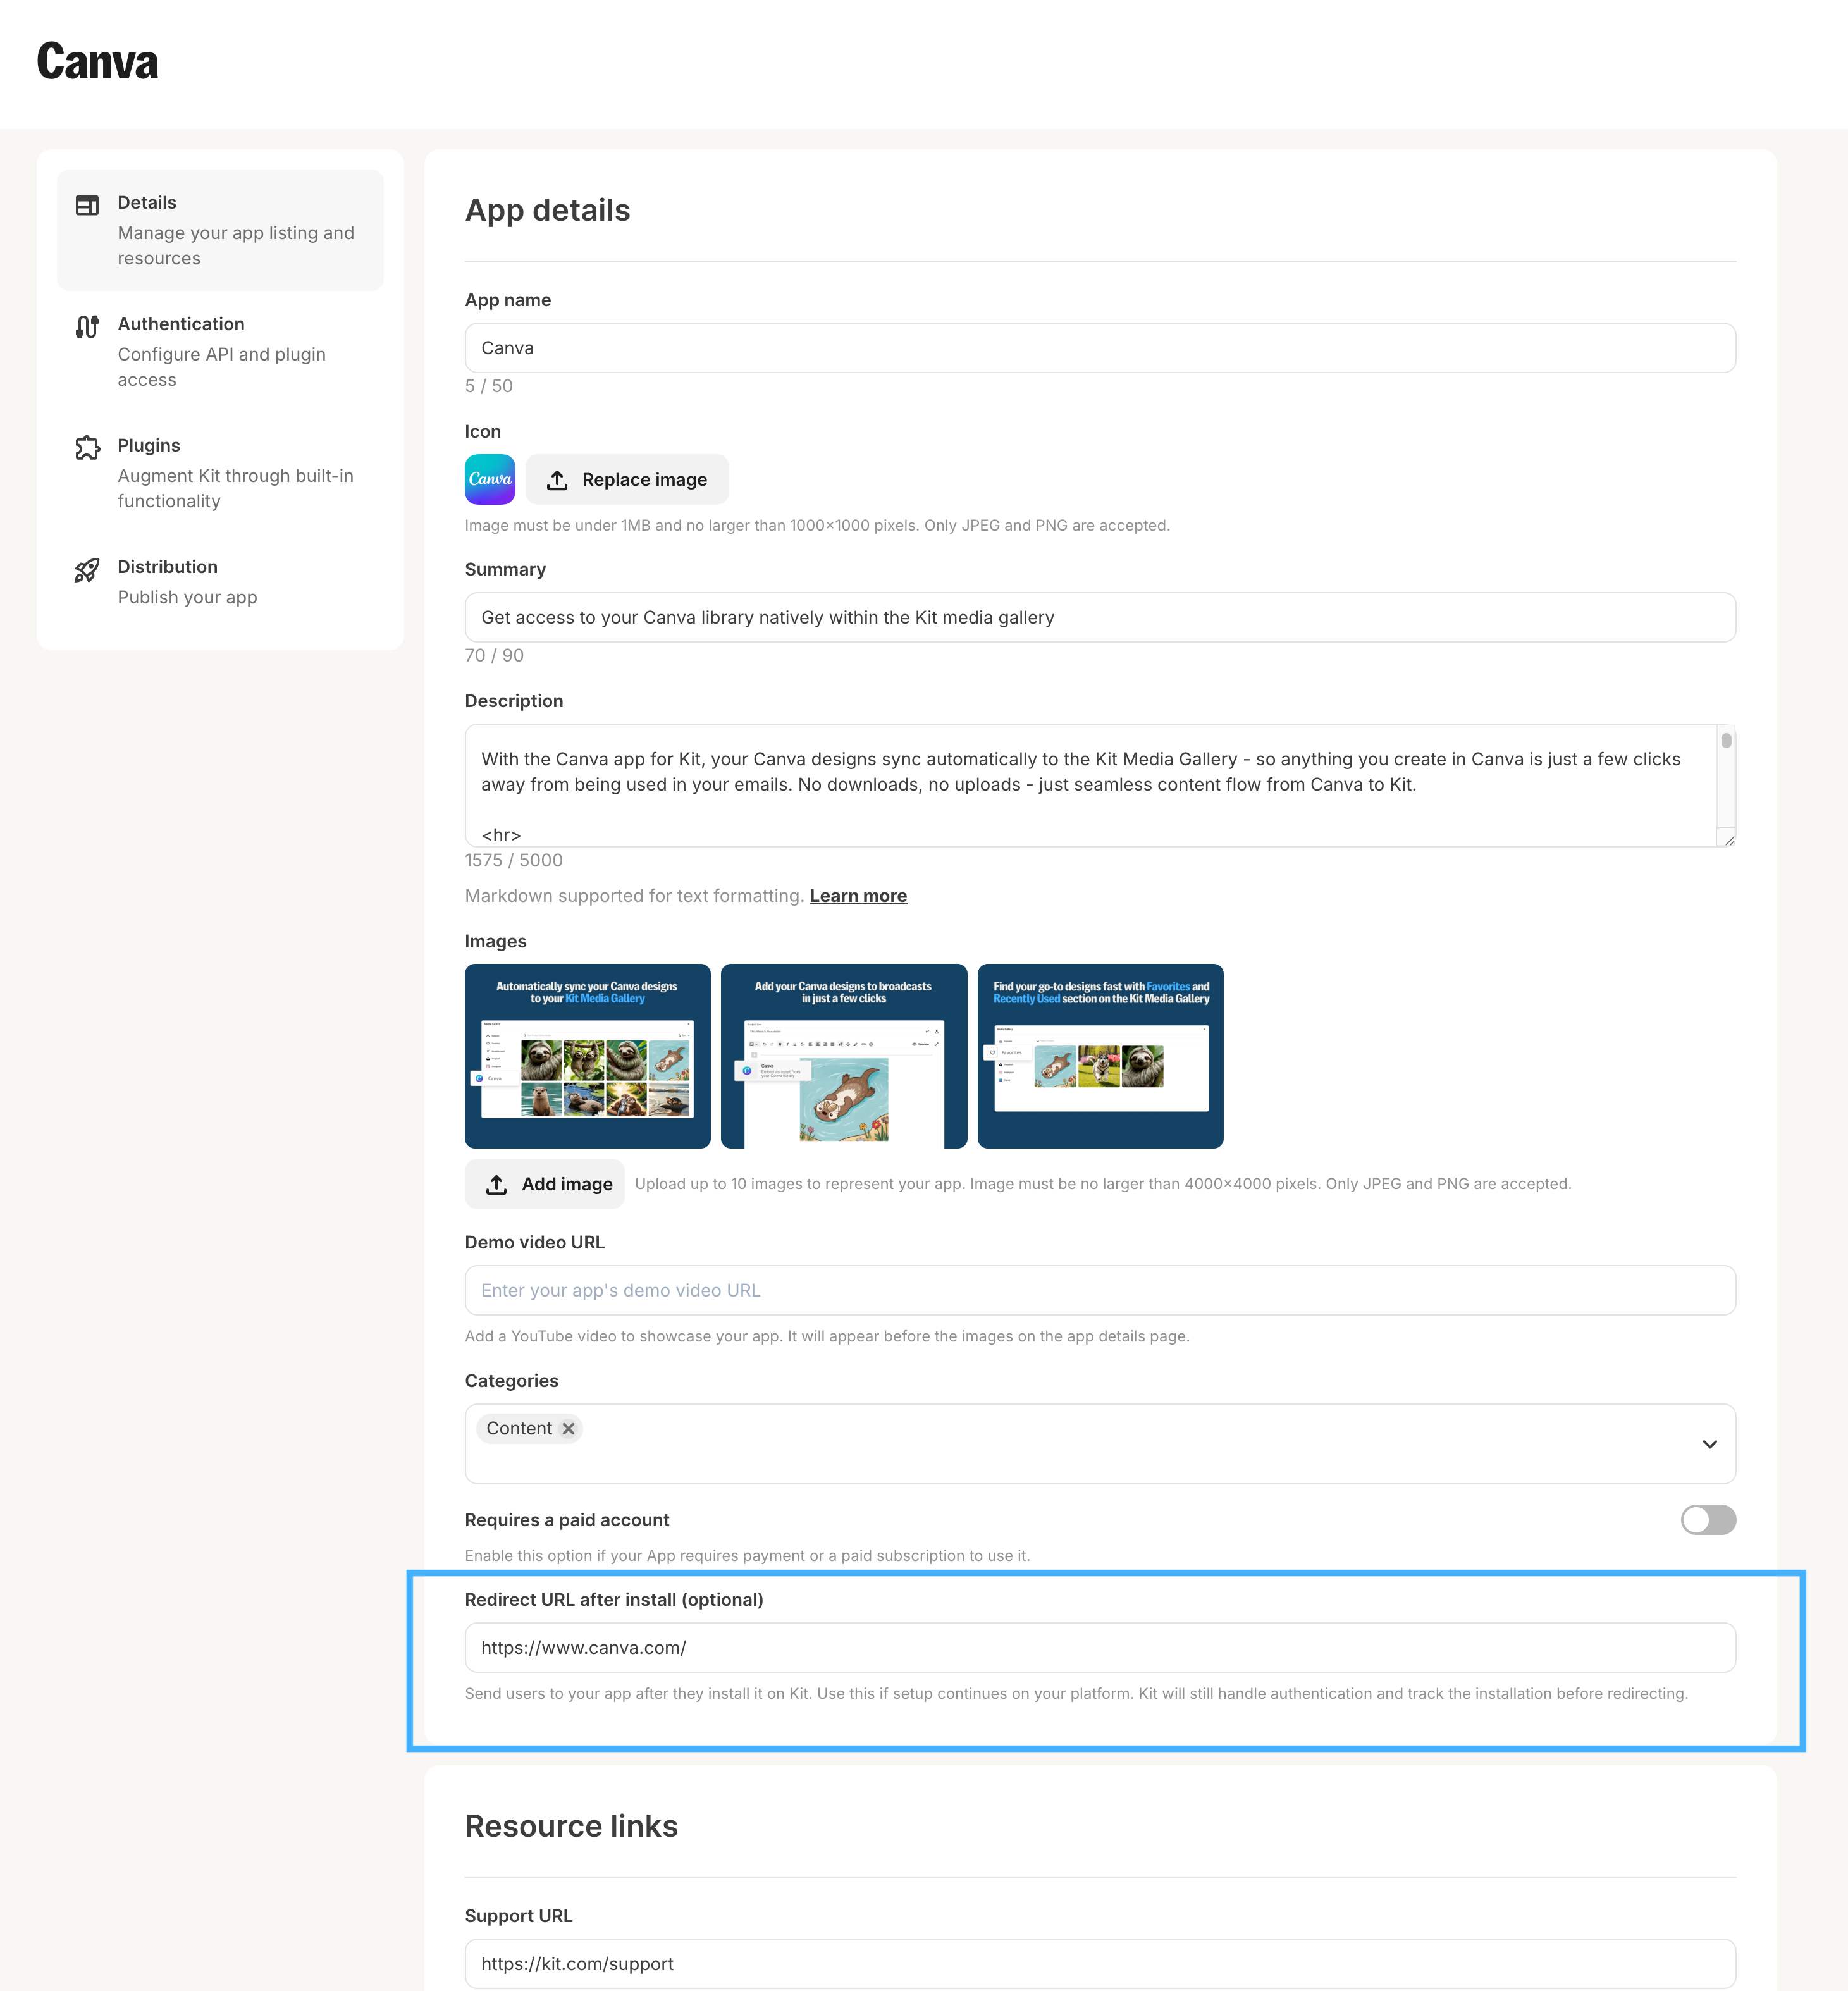
Post-installation redirect
Your app may also include the option to alternatively send creators to your app, or an externally hosted onboarding flow, post signup. This can be configured using theRedirect URL after install field in your app details setting page. An example of this flow can be seen below.
Example redirect flow
Example redirect flow
Redirect flow settings
Redirect flow settings
Plugin scopes
When configuring OAuth for your plugins, you’re able to define scopes that specify which permissions your app requires from the creator’s account. These scopes are managed in the plugin settings page and play a crucial role in app versioning and authentication.Configuring Scopes
In the plugin settings page, you can define the scopes your plugin requires. Kit tracks these scopes cumulatively across all plugins in your app, which means:- Each plugin can declare its own required scopes
- The total scopes for your app are the combined unique scopes from all active plugins
- Changes to cumulative scopes trigger app versioning
Scope Format Requirements
When defining scopes, follow these critical formatting rules:- Never include spaces in scope names - Use underscores, hyphens, camel/snake case or colons instead
- ❌ Incorrect:
"read data","write data" - ✅ Correct:
"read:data","write:data","read_data"
- ❌ Incorrect:
- Spaces cause serialization errors when scopes are processed as arrays or comma-separated strings
- Use consistent naming conventions across all your plugins (recommended format:
action:resource)
When Scopes Trigger Re-authentication
Creators will be prompted to re-authenticate when:- You add a new scope to any plugin that wasn’t previously used by other plugins
- You create a new plugin with scopes not used by existing plugins
- The authorization strategy changes (for example, from “No authorization” to “OAuth”)
Testing Scope Changes
When developing and testing scope changes:- Plugins in test mode (created and have never been activated) require you to re-authenticate the app in your developer account when new scopes are added
- This allows you to verify the authentication flow before affecting production users
- Always test the complete OAuth flow with new scopes before publishing
Example
If your app has two plugins with the following scopes:- Product Gallery Plugin:
read:products,read:inventory - Customer Reviews Plugin:
read:products,read:reviews
read:products, read:inventory, read:reviews
Adding write:products to either plugin would trigger a new app version and require re-authentication, while adding read:products to a new third plugin would not.
For comprehensive information about app versioning and its implications for both creators and developers, see the App Versioning Guide.