User initiates install from Kit's App Store
Authorization URL you’ve configured.App generates code verifier and challenge
The code verifier is a cryptographically random string using the characters A-Z, a-z, 0-9, and the punctuation characters -._~ (hyphen, period, underscore, and tilde), between 43 and 128 characters long.
Once the app has generated the code verifier, it uses that to create the code challenge. The code challenge is a BASE64-URL-encoded string of the SHA256 hash of the code verifier.
The app will need to store the code_verifier for later use.
App requests user's Kit identity
Example redirect
Example redirect
Query parameters
Query parameters
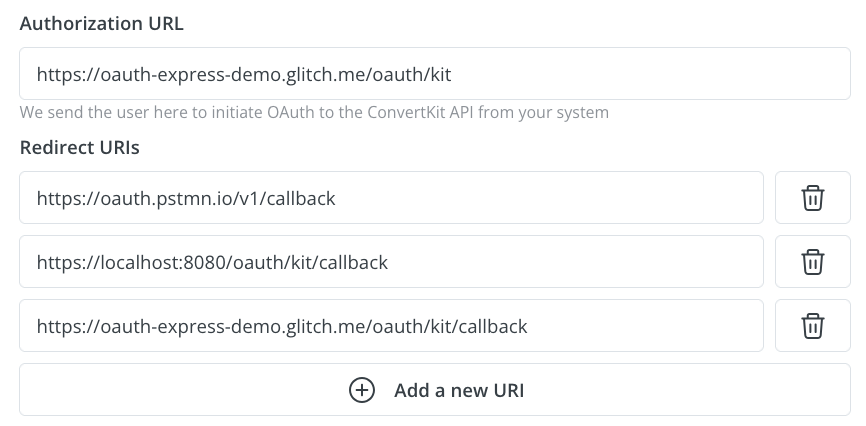
codeS256public. Fine-grained access control via scopes coming soon.redirect_uri and/or to protect from XSRFExample Kit app configuration
Example Kit app configuration
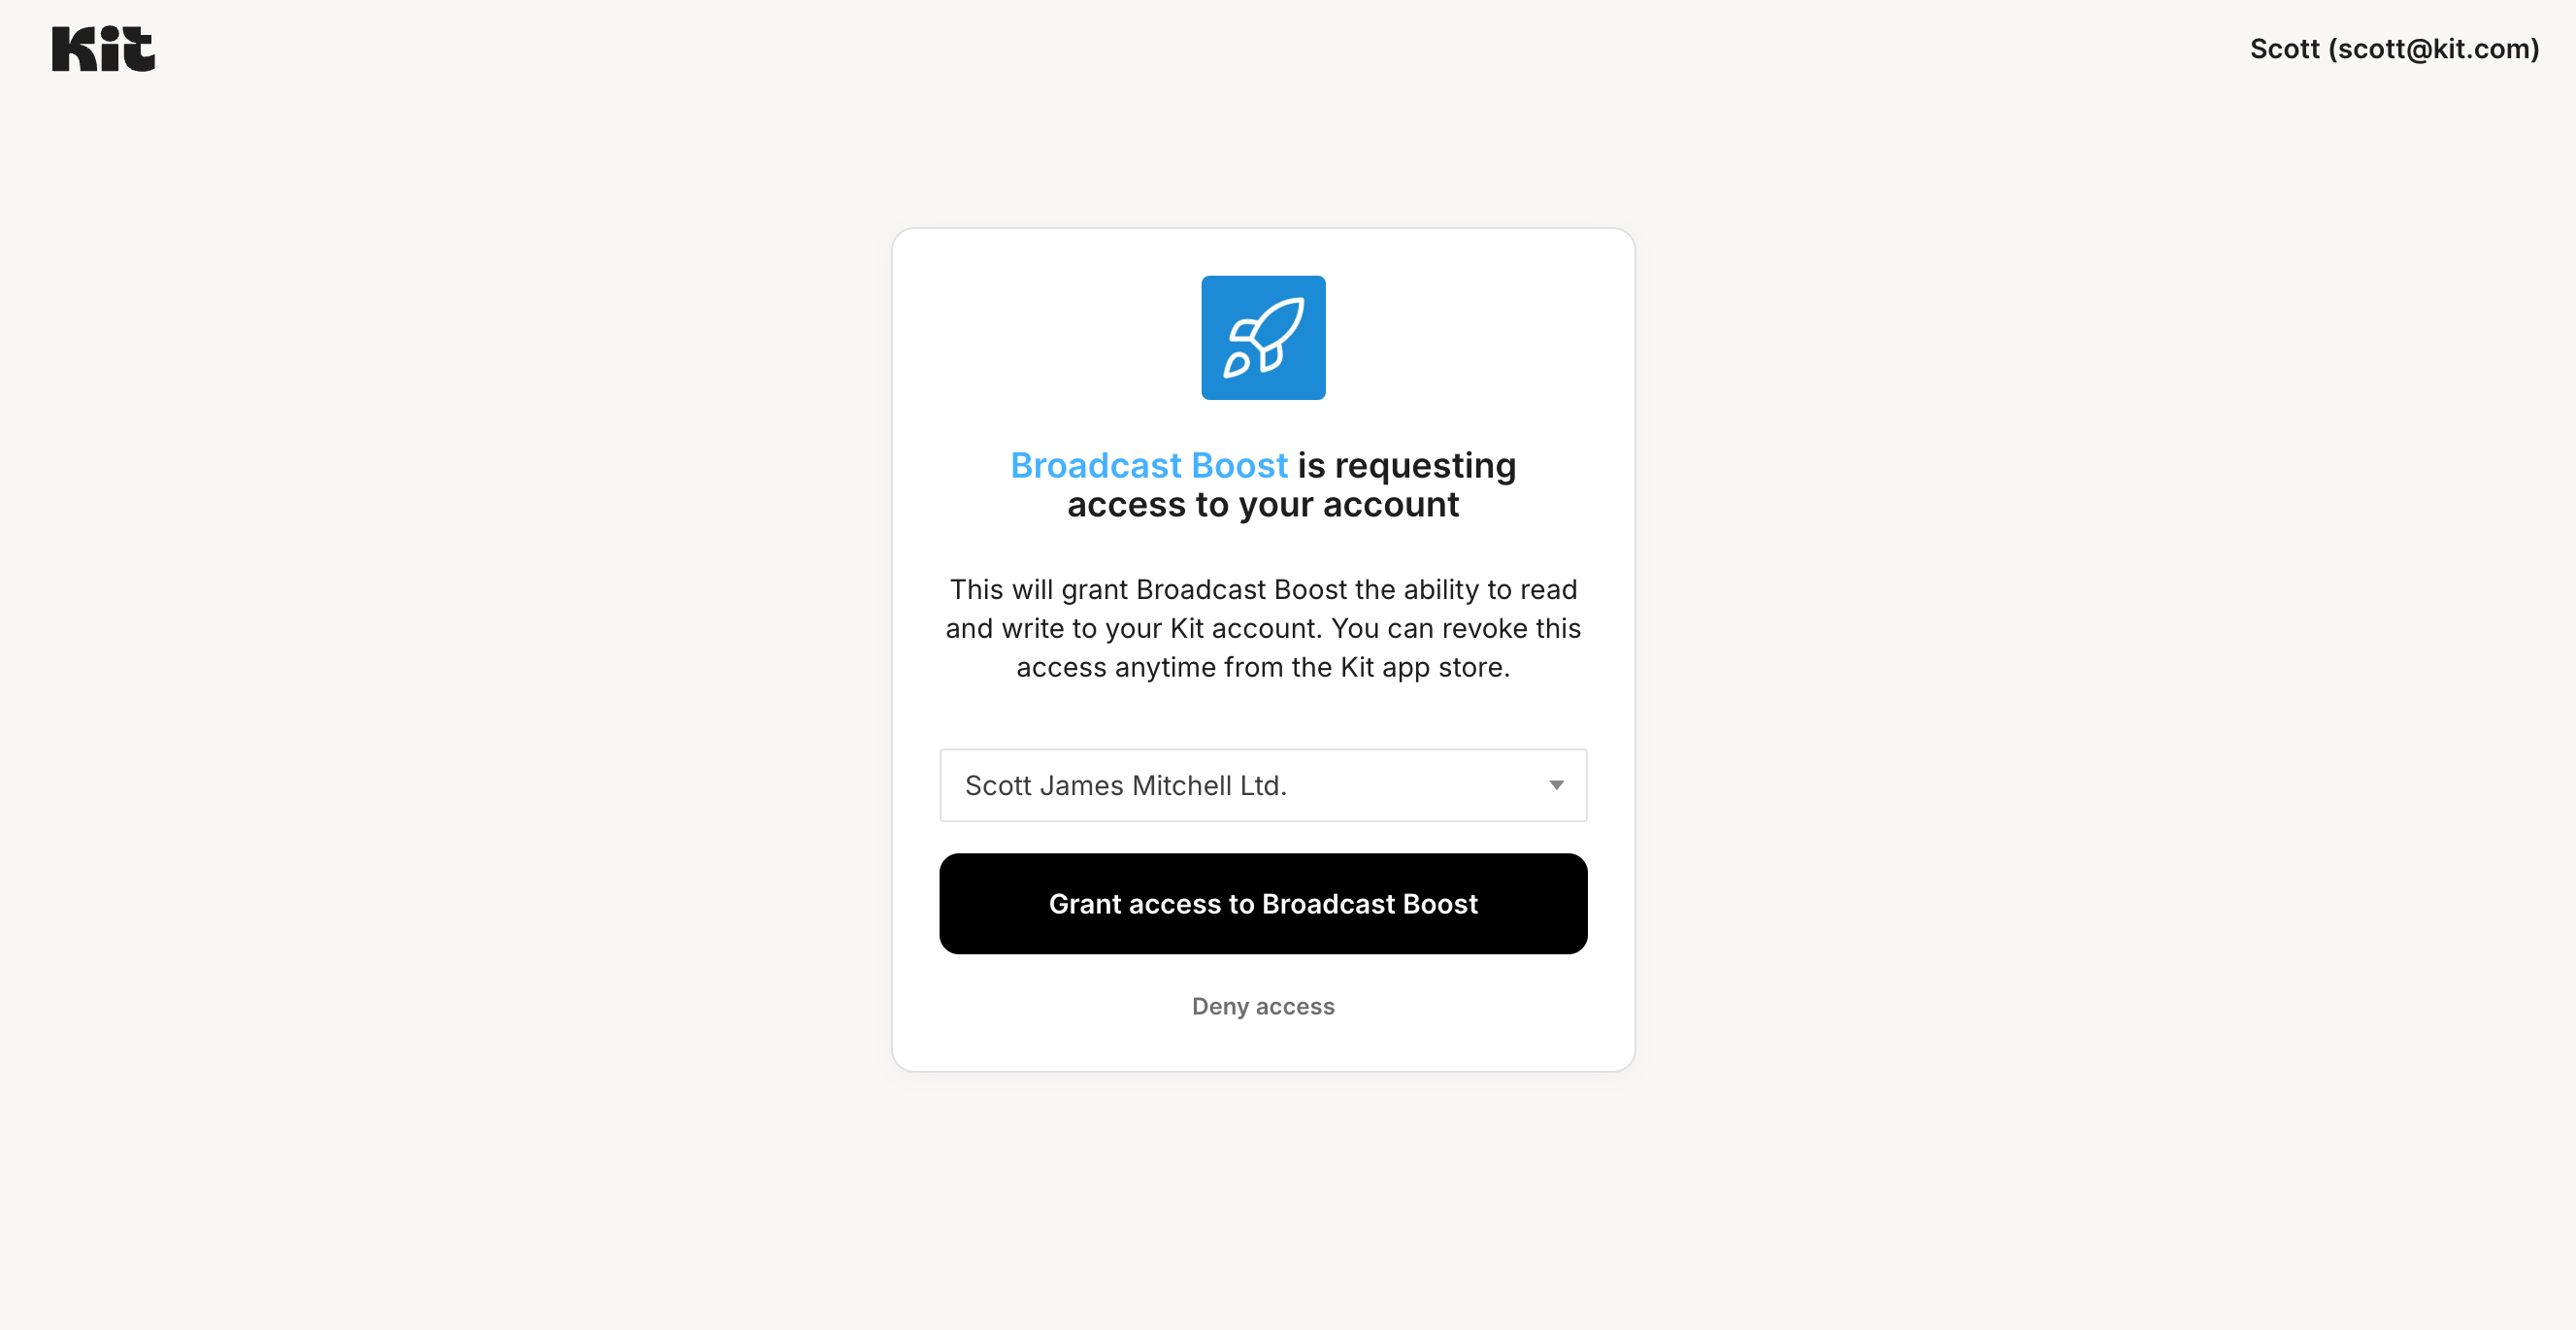
Kit prompts user for consent
Example Kit app OAuth page
Example Kit app OAuth page
Kit redirects to App OAuth callback with authorization code
redirect_uri you provided when requesting the user’s identity in step 2.
Kit appends a code query param with a temporary authorization code.
Example redirect
Example redirect
App exchanges authorization code for refresh and access tokens
Query parameters
Query parameters
authorization_codeCode samples
Code samples
Example response
Example response
Response schema: application/json
BearerApp redirects user back to Kit
redirect parameter provided at the beginning of the flow.
This will ensure the user properly navigates back to your app inside of Kit and registers that the app has been installed.
Redirect URL after install field in your app’s settings, a modal prompting creators to continue their journey on your configured site will appear at this point. See this section in the app details page guide for more details.Example redirect flow
Example redirect flow
App uses access token to make Kit API calls
Authorization header with the token as a Bearer value.Code samples
Code samples
App uses refresh token to obtain new access token after expiration
POST call to https://api.kit.com/v4/oauth/token, with the following body:Query parameters
Query parameters
Code samples
Code samples
Example response
Example response
Response schema: application/json
Bearer